The Grease Gauntlet - version 1.0
(revised instructions)
Materials:
(1) 5-foot section of 8" round sheet metal duct
(2) 8" round sheet metal end caps for duct
(1) ceramic light fixture
(1) ceiling electrical box
(2) 3' lengths of metal mesh "gutter guard"
(2) 10' lengths of L-shaped metal drywall trim (1" leg with holes x 1/2" leg without)
(26) #8 x 1/2" round-head, slotted machine screws with nuts and washers
(2) self-tapping sheet metal screws (1/2")
(1) 8' tool replacement cord with two-pronged plug.
(1) 3/8" cable clamp
(1) barbecue grill thermometer
Tools:
Power drill
Philips-head screwdriver
Flat head screwdriver
Pliers
Tin snips
7/8" spade bit
1/4" drill bit
1/8" drill bit


1. The Tube
Close the seam on the 8" round duct to form tube. Secure with duct tape at middle and near ends.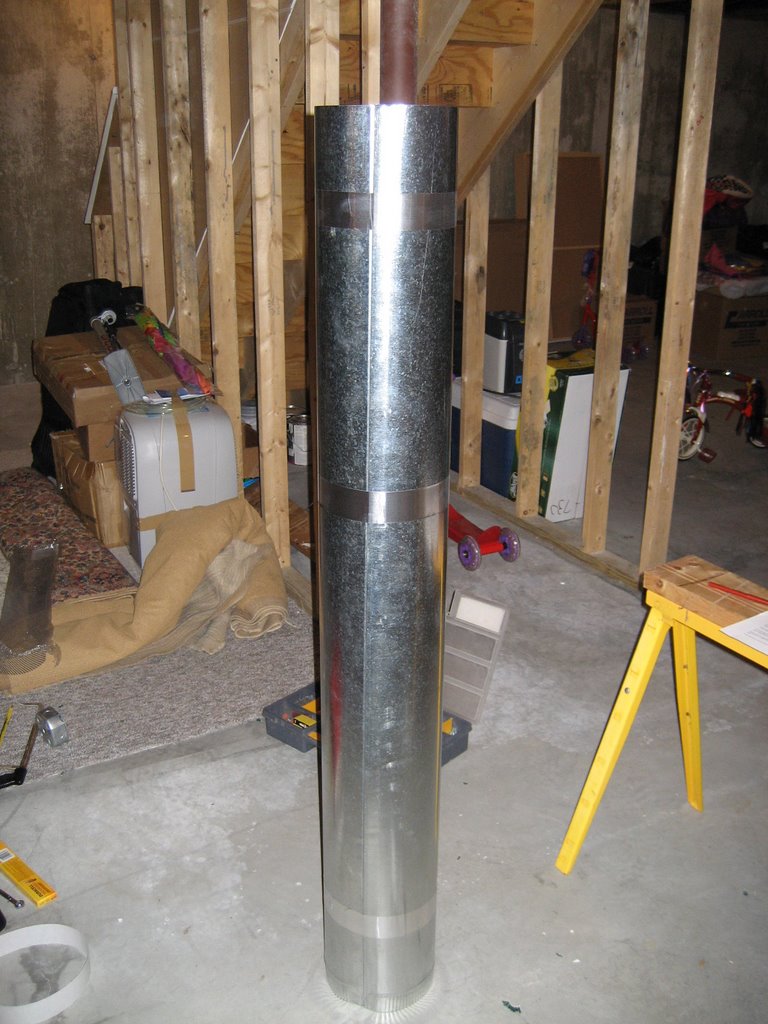
On the end cap, which is NOT going to hold the light fixture, drill (4) 1/4" holes, spaced about 1/8" apart, along the edge. These will serve as the drain holes for the liquid cosmoline to run out of. Opposite the drain holes, drill a small hole for the thermometer.
2. Electrical Work at End Cap
Remove one 3/4" knock-out on the electrical box to feed the cord through to the light socket. Center the box on the inside of the lid, trace the outline of the knock-out onto the lid, as well as the small mounting holes. Remove box, drill out (7/8" spade bit) the hole you just traced, and drill 1/8" holes where marked.
Attach the electrical box to the inside of lid with the #8 machine screws, using a washer and nut on the outside face of the lid.
Feed the cord through the cable clamp and through the lid from the outside, into the electrical box. push cable clamp through the hole in the box. Slide cable clamp nut over the cord and secure cable clamp to electrical box. Do not tighten clamp onto cable just yet.
Attach wires from the power cord to light fixture by looping around the screws and tightening. be sure there's no excess bare wiring exposed that could come into contact with any other metal parts.
Mount light fixture to electrical box using the two mounting screws on box. Pull the excess cord out the backside of box. Tighten mounting screws and the cable clamp.
Screw in a 100-watt bulb, and set this assembly aside.
(note: as I'm typing this, I'm waiting to see how hot the tube gets inside with the 100-watt bulb, and might have to switch to something bigger still)
3. The Parts Sled
Cut four (4) 4-foot lengths of drywall trim (get a hole to line up 1/2" from the cut end). These pieces will be the runners for the sled.
EDIT: In addition to reducing the sled length to 3-ft., I would suggest cutting the runners a couple inches long, installing them as described below with an inch over hang, so as to line up the screws evenly, and then trim the excess length off the ends when finished.

Cut one of the 3-foot lengths of gutter guard in half, making a section approximately 18" long.
Attach one runner to the edge of one of the gutter guard sections using the #8 screws and nuts and washers. Start at the end, and put a screw in every 12 inches. After the third screw is in, line up the cut section of gutter guard (cut edge underlaps the uncut section by about 6" or so) so that the end lines up with the end of the runner.
EDIT: If building the extended (4-foot) sled, the cut section of mesh must be staggered sideways by half a mesh opening (if that makes sense) to keep the edges symmetrical. Lining up the edges on one side of the sled won't give you an even edge on the other side.
Continue fastening with the #8 screws every 12". Note: the fourth screw will be right at the end of the uncut section of gutter guard. Now, add another screw to line up with the cut end of gutter guard. There will be six screws per runner.
EDIT: Use a punch or a 3" nail to ream out the holes somewhat if they don't line up exactly.
Attach the runner on the other side of the sled in the similar fashion.
For the inside runners, the pieces will be flipped so the "leg" with the holes will be pointing toward the outside runners. Space them so the runners are evenly spaced across the bottom of the sled.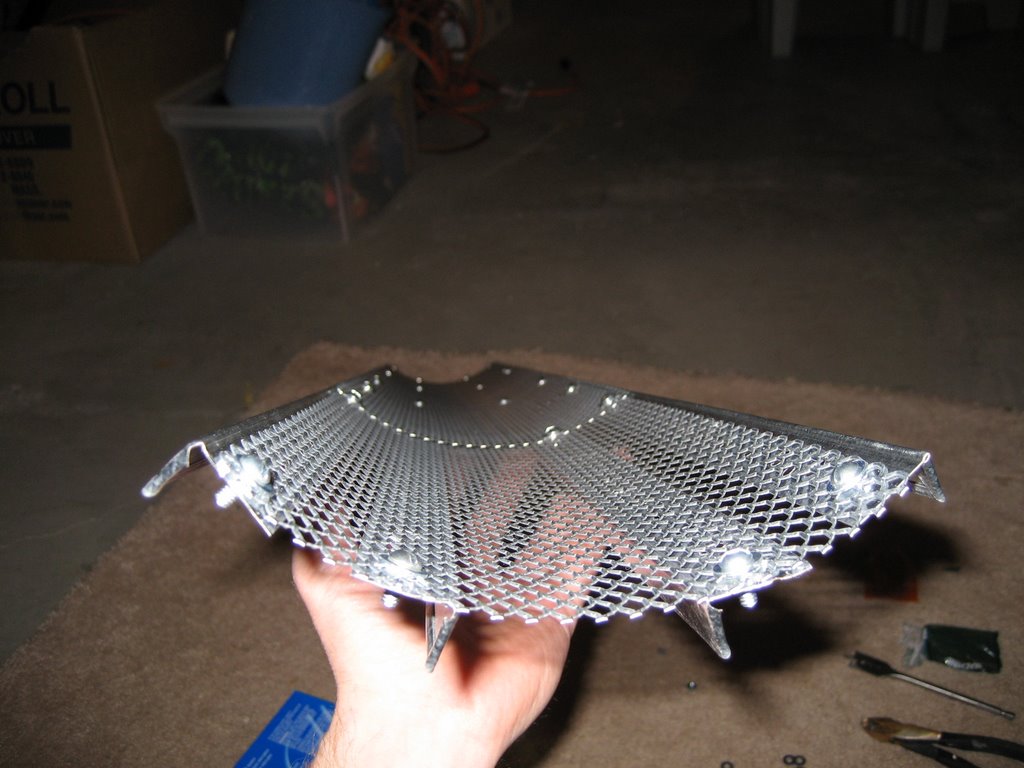
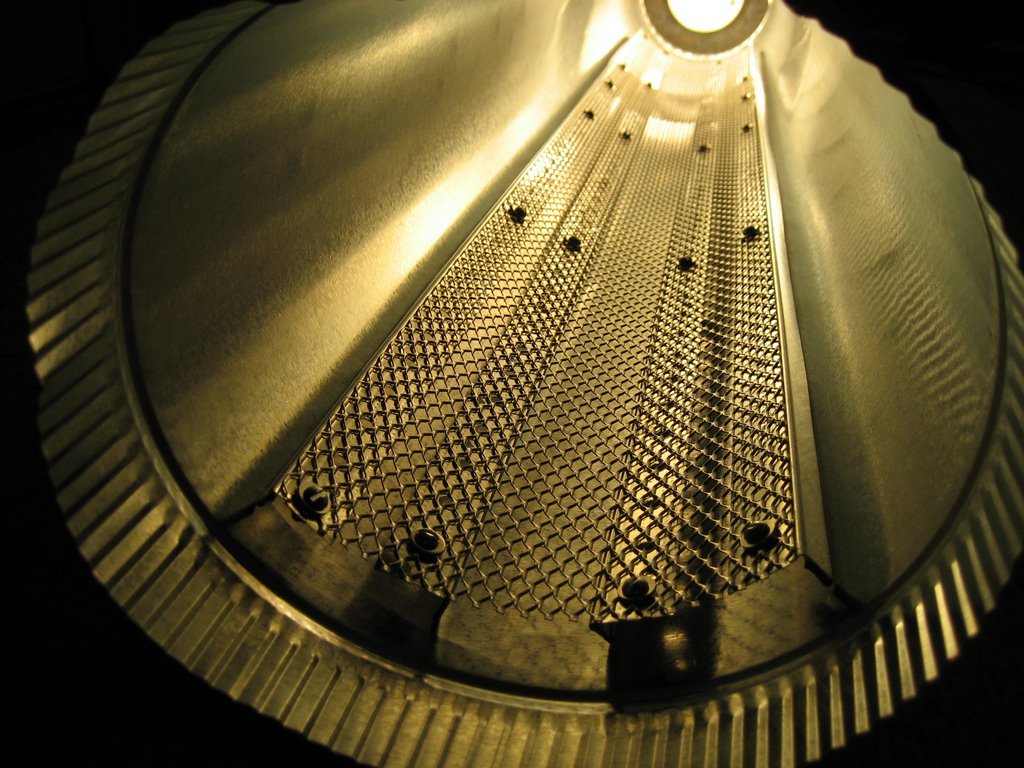
And, here's the sled inside the tube.
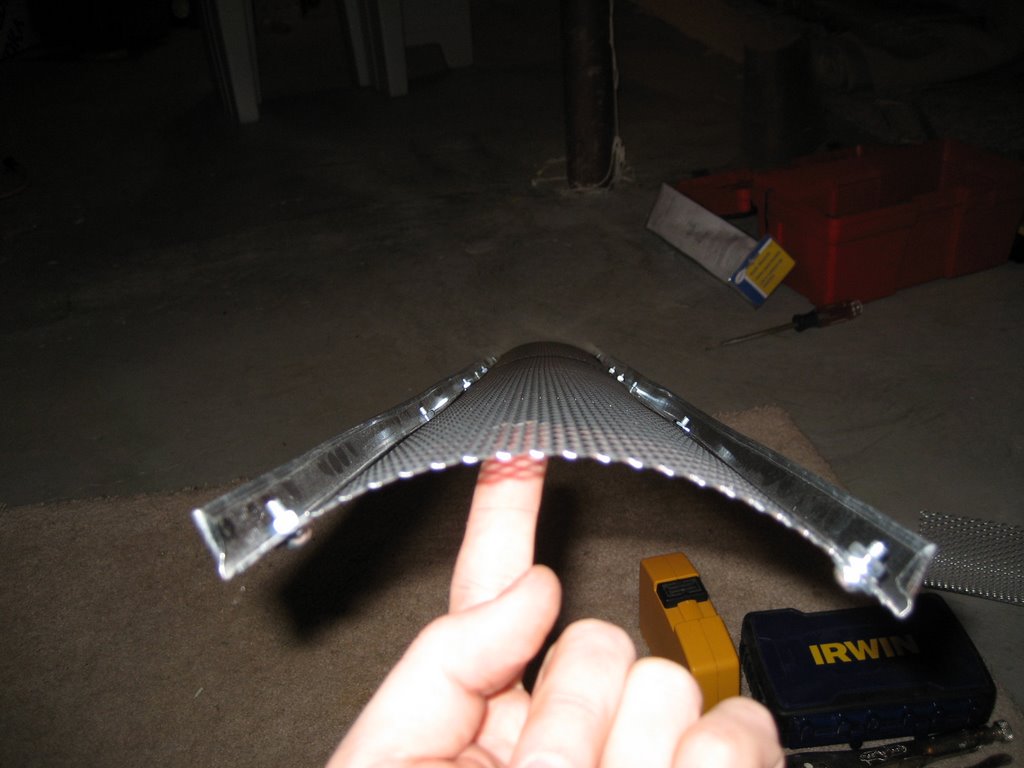
EDIT: I'd like to thank the gutter guard manufacturer for producing a product that's curved perfectly to fit inside an 8" round duct.
4. Assembly and Use
Place the end caps on the tube and plug in the power. The end cap with the light fixture should go on the uncrimped end. This will require a couple short snips in the end of the duct to make it fit.
EDIT: Think trying to put two soda straws together.
Check the temperature to see how hot the tube gets inside. If the inside temperature exceeds 150 degrees, decrease the wattage of the bulb and/or drill a row of vent holes along the top of the tube. If the temperature is too low, increase the wattage or type of bulb used.
Once you determine the adequate bulb wattage, secure the end cap with the light fixture using two self-tapping sheet metal screws.
EDIT: Using a 100-watt bulb and insulating the tub with a blanket will get you to 150 degrees, at the hot end anyway. A viable alternative would be to mount a light fixture at both endcaps.
And, you're good to go.
Place your parts to be de-cosmolined on the sled and slide it into the oven.

Place the end cap on (drain holes down). Prop up the closed end to create a gradual slope down toward the drain, place drip pan under drain holes, and turn on the power. All I need to work out now, is a set of legs to support the tube and hold it at the proper angle.

That said, I think I'm going to cut it down to 3-1/2 feet long with a 3-foot sled. I like the design, though - just have to make it work.


